Hi! Welcome to my life and the mess that I have fun creating everyday. I am an Australian, mother of three and nurse to many. Passion resides in the creative arts and finding joy in the daily colour of life I would love to hear from you! With respect if you list or print content from my pages please link back to me
Showing posts with label quilt as you go. Show all posts
Saturday, 9 February 2013
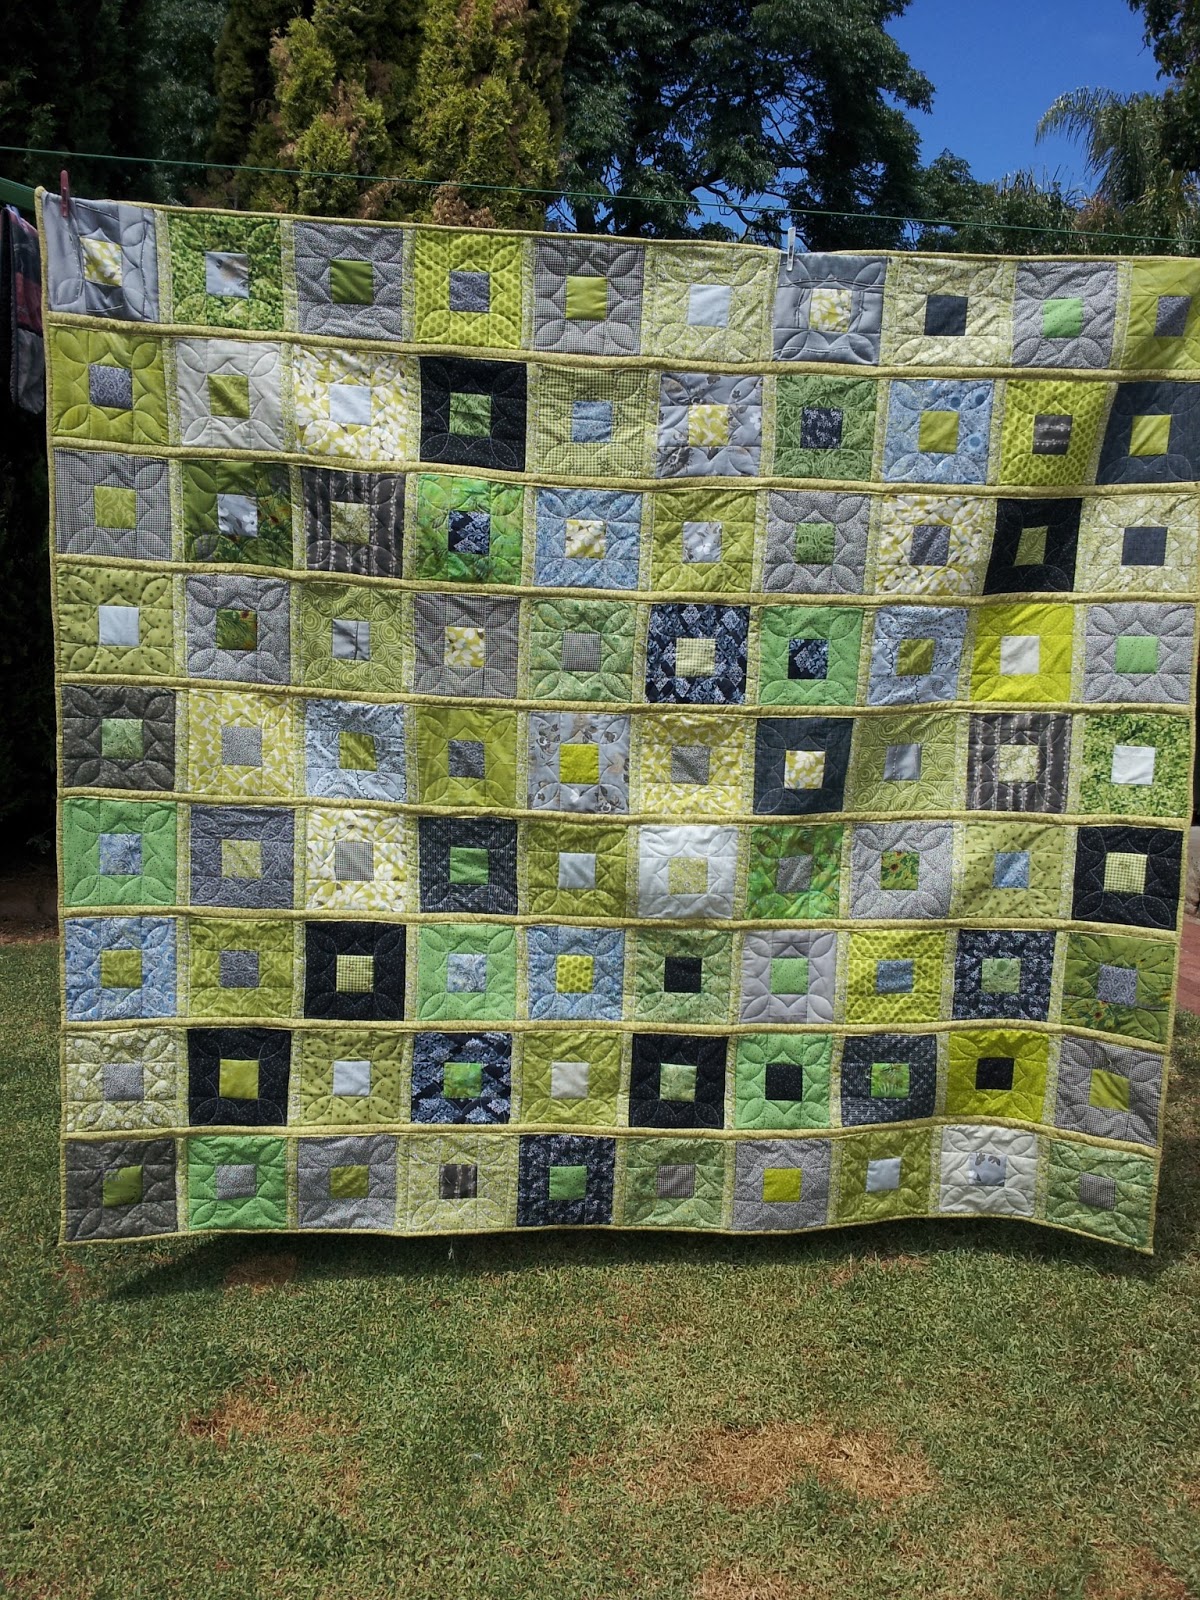
Quilt As You Go - The Big Reveal!
Its pieced, sashed, bound and bordered - thank goodness.
I've rectified mistakes and tidied the many, many threads hanging off both front and back.
I managed to find a reasonable match for the sashing as I had only enough colour to go one way. Although I didn't plan the border to be the same colour as the sashing I had just enough for that as well. (My original thought was to do the outside border in the black and white print, so I still have 3 meters of that material left over)
There are multitude of mistakes in this quilt, generally due to the fact that I am a slack sewer. Perfection is not my forte, generally I just want to get the job done. Even so the overall composition is quite pleasing to the eye and the quilt is masculine enough for a young man.
I actually like the back more than I do the front. Big pops of colour are pleasing to the eye and give a generous audition for the materials to shine in their own right. (Now I sound all arty farty..hee hee)
Did you know that there is a whole clothes line full of clothes behind that quilt. The quilt does a good job of hiding it.
Just a test run of tossing it on the couch
A a preview of '" in my dreams " you'll ever find a quilt laid this neatly on a young man's bed. If my nephew is anything like my eldest he wont make his bed for three months unless forced to do so. ( I know this because I tested the theory and cringed every time I walked past his room. Eventually I couldn't stand it any longer and had to attack his bedroom ) Yuck!
Addit : Tutorial Part 1 and part 2 can be found by clicking the link
Wednesday, 30 January 2013
Quilt As You Go - Part 2
A long long time ago I started a "quilt as you go" quilt for my nephew for this 21st. Birthday
Yes I started it after his birthday in July. Looking back over the blog dates it was in August last year that this journey began. I had started a tutorial which you can find here and promised to continue it when I'd finished piecing all the squares. I think originally I was going to do 64 squares but this has since grown to 90 to make a queen size bed quilt.
So finally....I have made all 90 squares.
My colour scheme has also changed, originally I wanted to make a sour green and grey quilt but now have incorporated bright green and inky grey/ blacks
To make the strips place the squares back to back with the right sides facing outwards and join with a 1/4 inch seam. the join will show on the top of your quilt. I alternated green then grey squares
To cover the seam use a strip of material 2 1/2 inches wide. fold in half length wise. With the opening facing the seam of the quilt place a 1/4 of an inch from the seam , pin in place. Sew a quarter of inch in on the strip - so you sewing line is 1/2 from the quilt top seam. Remove pins and flip the stripping over the seams, pin in place and sew.
Sew in place
Continue until all the pieces are joined in rows ..... Then do the big join between rows the same way and add binding and you are finished. Only takes time and patience...
Almost but not quite finished. On with the show..
This quilt would work for framing pictures for eye spy quilts and allows for the underside of the quilt to also be patterned... I will show the back when the quilt is finished.
Hope you can understand my instructions - but a picture paints a thousand words...
Sunday, 19 August 2012
Quilt As You Go - A tutorial
For a while now I have been collecting grey and sour green fabric squares with the view of making a quilt as you go quilt. The impetus to start this quilt now is my nephews 21st birthday, which I have already missed and it was always my intention to present each niece and nephew with their own quilt on their 21st - better late than never. Quilting as you go is infinitely faster than hand quilting, although I do enjoy that slow labour of love. This quilt is a great way to utilize any scrap wadding you may have collected over the years
The quilt squares measure nine inches when quilt completed
For Green Block
Backing square is 9 1/2 " Green material
Wadding square is 9"
Front pieces :
center block 3 1/2" square in grey
center outer cut two 3 1/2" square blocks in green
outer panels cut two 3 1/2 x 9 1/2 " strips in green
Grey Block reverse colours
1.On backing square outer edges mark guide for seams at 1/4 ", then 3" spacing x3, then 1/4"
Pin wadding to backing allowing for 1/4"seam allowance. Wadding tends to move so pinning is essential. Draw lines between texta marks to form grid for seams.
Place center colour (grey) with on outer 3 1/2"square on top geen.
Sew from end to end of backing block across wadding and center square
Open up press seam and pin
Align other centre outer square with centre grey square and follow seam line on backing square from end to end
add outer panel following seam guide line sewing end to end
Complete grid with last outer panel
To quilt mark quilt block as follows
And follow guide for quilting line - its all done on an ordinary sewing machine.
When you've complete the required number of block for your quilt lay out in order of sewing.
Lay the 2 back sides together and sew allowing 1/4 "seam allowance. the grid lines should meet up on the back and the front of your quilt will have open seams.
Sew together strips of two blocks wide only
The sashing between blocks must be added
I shall continue this tutorial next instalment- Adding Sashing ( I've run out of time!)
Addit: Many months later and you can find the completed tutorial here and a view of the completed quilt here.
Subscribe to:
Posts (Atom)


